Wednesday, May 11, 2011

Project 4: Biographical Toy


 Materials


Some pieces


Final Outcome


Reflection Paper

          When we were given the assignment to create a biographical toy for our final project, a lot of ideas popped into my mind. After considering some different ideas, I focused on recreating a toy similar to my favorite one from when I was a child; a marble maze. When I was in elementary school, one of my best friends had plastic pieces that connected together to make a path for marble to travel on. Every time I went over her house, all I ever wanted to do was build with this toy. It is one of the first toys that comes to mind when I think about my childhood, and I wanted to do my best to replicate it.
          While looking for recyclable objects to use, I came across all of my old Legos. These were other toys I loved to build with when I was younger, so I chose to incorporate these in my project as base structures. I then decided on a deck of cards to make the pathways for my marbles to travel on. I wanted something that was sturdy yet flexible. I also used old pencils that I found around my house to help hold the structure at various levels. To hold the project together I used hot glue and tacks. Finally I put the marble maze on a piece of foam board to keep the toy strong while it was being used. This gave it support so it would not fall over when the marbles were traveling through out the pathways.
          I was very satisfied with the outcome of my toy. I believe it relates back to my childhood a lot, and I even found myself playing with it many times before it was due. This is a toy that I could see a lot of people having fun with. I received many comments from my suite mates about how they wanted to play with it also. Overall I had fun in creating my final project, and it was one of my favorites this semester as well as the class! 


Tuesday, April 19, 2011

Project 3: Polyhedral

Phase A: Mask

Process:


Outcome:


Phase B: Wall Structure

Model Idea


Process:


Outcome:


Reflection

When I first began to make my polyhedral mask, I was unsure of what I wanted to do. Since I relate most of my projects back to things that interest me, I chose to go with a soccer themed mask. When exploring different polyhedral online, the first one that stood out to me was a cutout of a soccer ball. Immediately I based my project from here, picking out a cone structure to act as a cone used in practice, and a trapezoidal prism to represent a goal net. With the soccer balls, cone, and net, I aligned these to make the form of a face; soccer balls as eyes, cone as nose, and net as mouth. The reason I chose the colors is because those are the typical colors that the real life objects would be made in. I wanted to make the objects look as realistic as I could. I was satisfied in solving the problem successfully, although I wish my base had less of a rectilinear shape to it.
In approaching my polyhedral wall structure project, immediately I began to think about cutting out shapes of prisms to make different effects with light and color. I chose to use an octahedron and cut out different shapes to let the negative space play an important role in the structure. I then decided to also use the primary colors inside the polyhedral while leaving the outsides of them white. This way, when placed against a black background and having light shined on it, the colors, positive space and negative space would all work together to give a creative effect. This polyhedral wall structure has been my favorite project and I am very satisfied with the outcome. I donated a lot of time to it and I believe it is my best work so far in this course.

Tuesday, March 22, 2011

Project 2: Book Alteration/Serial Planes

Reflection Paper- Project 2
      When I approached the Serial Planes project, I was excited to experiment with what I was going to make. I did some research first on book alterations, and I was attracted to abstract objects and forms that others had built for their projects. Looking at examples from previous students had me set on the idea that I wanted to make something abstract. I was very eager to see what shapes and forms I could create using a bound book and an exacto knife.
     In doing Phase A of the Project, I chose to experiment with all sorts of methods in distorting the book. After cutting the book into pieces, I started first with curling techniques to curl the pages. This gave the pages a flowery look to them. Next, I chose to use a folding technique to create a fan-like effect on the pages. I folded them in different ways to get a range of shapes and styles for all of my pages. I also chose to cut into some of my folded shapes, to give them a more abstract feel. By doing this, I created unique patterns throughout the pages. With each piece of my bound book having been altered with a different technique, I used a hot glue gun to put the bindings back the way I wanted to come out with my final project for Phase A.
      When I approached Phase B of Project 2 I was excited to have the freedom of working with foam board. After doing some research and viewing past students work, I was immediately interested with incorporating stairs into my project. I wanted to build a more architectural based model of levels of stairs that made up a maze throughout multiple floors. I was intrigued by Maya Lin's work because not only was she an artist, she was also gifted in the architectural field, which I am very interested in.
      When I began constructing my Phase B of Project 2, I chose to do all different styles of staircases throughout each level that I was designing. This labyrinth of a structure was interesting to me because it would make viewer's eyes wander. It was neat to see where one floor connected to others and how many different ways you could approach each level. I used foam board for the entire phase, and hot glue to hold the pieces together properly.
      Overall, I enjoyed doing both phases of the Serial Plane project. I enjoyed Phase B more because of the freedom. In Phase A, we were stuck to work with a book of pages that was bound together. This binding could not be removed. With the foam board however we had more freedom to do whatever we desired to create serial planes. This freedom allowed me to create a piece that was more architectural rather than abstract. I am glad that each phase proved to be a different task, because it led me to have two completely separate ideas for what I was going to design. I truly like how both of my projects came out, and I would not change the approach I had taken if I were to do the project a second time.


Serial Planes- Book

Book Alteration


Serial Planes- Foam Board

Research Images


My Project

Model Idea


Final Project


Monday, February 14, 2011

Project One: Reflection Paper


Creativity is inventing, experimenting, growing, taking risks, breaking rules, making mistakes, and having fun.” — Mary Lou Cook

That statement is exactly why I am so intrigued by my own creativity. I always challenge myself to come up with ideas that may or may not turn out the way I want them to. No matter what, I always learn from each experience and can better prepare myself by growing from my mistakes. Sometimes, mistakes turn out to be beautiful and that is a very important part of creativity. Masterpieces can come from taking risks and enjoying any project. This sparks a great interest within me with the design field, and more specifically, interior design.
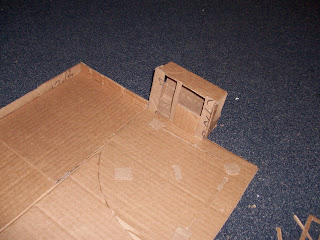
When I was assigned the “Anything But A Box” project, I wasn’t sure how I wanted to approach it. Although I am very attracted to abstract objects, I chose to design something that related to something very important to me. I decided to build a softball field, because softball is a huge part in my life and has had the largest impact on me. In my eyes, a softball field is a sacred place, and it is where some of my biggest dreams have come true.
I began this project with a box that’s base was approximately 10”x14” and was about 8” in height. My first task was in creating an infield and outfield that fit together in the shape of a typical softball field. In this process and throughout the rest of the assignment, I used a hot glue gun and my exacto blade to get the results I had desired. My next task was to make the base 3-dimensional by adding a fence around the field.
In addition, I added bases, foul lines, a pitcher’s mound and home plate to complete the design on the infield. I continued by building dugouts for each side of the field, which was challenging to get each piece to fit together how I had wanted. Another hard challenge was creating a backstop behind home plate that curved at the top to resemble a real life backstop. The cardboard was hard to curve, but I was able to manipulate it best I could to get the effect I needed.
For my final touches, I included a scoreboard, foul posts, and a quote in the outfield. Since softball has had such purpose and meaning in my life, the quote “where dreams come true” that I placed on the field relates myself to softball very successfully. I was very satisfied with the outcome of my project. I have learned that a simple cubic box can be manipulated and turned into anything one wishes to turn it into. I had a lot of fun creating something that I thought would be different than many others projects. If I could change anything, I wish that I had used a more flexible and thinner cardboard to get a cleaner looking final outcome. I feel as if this would allow me to add more detail to the field also. In conclusion, I think this project was successful and I am happy with my final outcome.